Quantcast
Channel: Mulberry and Pomegranate
Viewing all 231 articles
Browse latest View live

Greek style garlic prawns (γαρίδες με σκόρδο)

$
0
0


This dish is definitely one for the seafood lovers - ideally enjoyed on a tranquil Greek beach with a little ouzo or crisp Greek white - and don't forget the sound of some bouzouki in the background!


However, if you don't happen to have a Greek beach to hand, don't despair - this dish is really perfect to be served anywhere in the spring and summer time. In fact, it even adapts rather well to the cooler months. There is generous amount of garlic, a little chilli and good splosh of ouzo and it all marries perfectly with some freshly chopped dill and lemon zest. Best of all, it is super quick to make - giving you much more time to linger over that crisp white wine and mop up the sauce with some good quality rustic bread or sourdough.


Greek style garlic prawns (γαρίδες με σκόρδο)


Ingredients

Olive oil
4 garlic cloves, sliced
Very small pinch of Greek saffron threads 
1 small red chilli, chopped
12 green prawns, shelled, tails intact
pinch of salt
2 tbsp of ouzo
1 tbsp of fresh lemon zest
1 tomato, peeled, de-seeded & finely chopped
2 tsp chopped fresh dill

Method

1. Pour oil into a small frying pan to about 1.5 cm deep. Heat over medium–high heat. Add the tomatoes and saffron, cook for a few minutes.

2. Then add the garlic, chilli and prawns, they should start sizzling immediately. Cook for 15 seconds then turn the prawns over. Add the salt, ouzo, lemon zest and dill, then serve straightaway.


Tourlou Tourlou (Τούρλου Τούρλου)

$
0
0


Tourlou Tourlou (Τούρλου Τούρλου) is a baked dish of vegetables—potatoes, zucchini, peppers, tomatoes—baked in the oven with onions, parsley, garlic, black pepper and lots and lots of olive oil. It belongs to the category of "Ladera", meaning dishes prepared with an exceptionally generous amount of olive oil. A tourlou tourlou is very much like a French tian (which I posted a recipe for recently). A tourlou tourlou is also sometimes called a briam (the Greek dish that is similar to a French Ratatouille) and the terms "briam" and "tourlou tourlou" are often used interchangeably in Greece.


However, a tourlou tourlou and briam differ in that in a briam the vegetables are first cooked separately in olive oil and then combined into a glorious stew. However, a tourlou tourlou is all about the strategic layering of particular vegetables. Indeed, the order and layering of the vegetables is the real secret of success here. And when it comes to the vegetables themselves – there are again regional differences in terms of which ones are added or subtracted from the mix.


My version is my mother in law’s Zakythinthian tourlou-tourlou. No eggplants are used in this dish, but instead there are green beans and plenty of okra. You can even add a little swiss chard, called seskolo, if it takes your fancy – and it certainly does in Zakynthos, being a much loved green!


This recipe is real Greek home cooking at its best. For me, it brings back memories of summer trips to Greece. The tourlou tourlou was made before heading to the beach and the flavours were perfectly melded by the time we arrived home, ravenous from a few hours swimming.


The traditional dish used to make the tourlou tourlou, is the "tapsi"– a large, round stainless steel baking pan. First into the tapsi comes the onions, then the beans, okra and zucchini – before potatoes, capsicums, more onions and tomatoes. Freshly chopped parsley is sprinkled on each layer, along with slices of fresh garlic and plenty of salt, pepper and a good drizzling of olive oil.


This is my favourite kind of spring and summer food – and is incredibly healthy and very nutritious. Little children love the bright, colours – and they are often persuaded to wolf down a plate or two - if it is served with lots of feta.


Tourlou Tourlou (Τούρλου Τούρλου)


Ingredients

4 onions (a few red and brown), sliced
½ kg green beans
½ kg of okra, cleaned, soaked in vinegar and rinsed well
4 zucchini, sliced on an angle about 1/4 inch thick
3-4 small red capsicums, chopped
1 head of garlic, cloves peeled and sliced
6 cloves garlic, sliced
3 -4 large tomatoes, sliced (make sure to add all the juice from the tomatoes as well)
1 bunch parsley, washed and finely chopped
3 potatoes, peeled and sliced 1/4 inch thick
1 & ¼ cups of olive oil
Salt and ground black pepper to taste.

Method

1. Pour about 1/4 cup of the oil into the pan, enough to coat the bottom well. Add the sliced onions.

2. Then add the green beans and okra. Drizzle with a little more oil (about a tablespoon), parsley, garlic slices and season.

3. Then add the zucchini slices. Again, Drizzle with a little more oil (about a tablespoon), parsley, garlic slices and season.

4. Then the sliced potatoes. Again, Drizzle with a little more oil (about a tablespoon), parsley, garlic slices and season.

5. Then the chopped capsicums. Again, Drizzle with a little more oil (about a tablespoon), parsley, garlic slices and season.

6. Then add a second layer of sliced onions.

7. Finish with a layer of the sliced tomatoes and a final drizzle of the remaining oil, parsley, garlic slices and season.

8. Cover the dish with foil and put in a 220C degree oven and bake for 20 minutes, then turn the temperature down to 160C degrees, and cook for a further one hour and a half. Check occasionally while it’s baking to make sure there’s still some liquid in the bottom of the pan. If it gets dry or starts browning on the bottom, add about 1/4 Cup of water or tomato juice if you prefer. About half an hour before the dish is ready to come out of the oven, remove the foil and give the dish a bit of a shake – but don’t stir the layers – and return to the oven. If you like you can also pop the dish under grill for about 5 minutes. Serve with some crusty, rustic bread and feta.


Cooking with Tselementes: souztoukakia (σουτζουκάκια)

$
0
0


A few weeks ago, I posted a recipe from the holy grail of Greek cooking, Tselementes. In that I post, (which you can find here) promised to slowly work my way through the book and share with you my efforts In respect of Mr Tselementes' recipes - tweaked every so often with the wise counsel of Ma, having resulted from her 50+ years experience cooking with Tselementes. So, without further delay, in the post I give you Mr Tselementes' recipe for soutzoukakia (σουτζουκάκια) - otherwise known as Smyrna sausages or meatballs.


These hard to pronounce delights are basically a spicy meatball shaped like a small sausage, cooked in a simple tomato sauce. They are a favourite at big Greek family gatherings, but also simple occasions such as a long and relaxed Sunday family lunch. The reference to 'Smyrna sausages' is a homage to the Greeks who left Smyrna and brought this dish with them to Greece.


For a homely meal, souztoukakia are perfect with a side dish of rice pilaf, simple steamed rice, mashed potatoes or - for a bit more of a party some homemade potato chips and a simple tomato/cucumber salad.


Tselementes' Soutzoukakia (σουτζουκάκια) (Smyrna Sausages)


1 & 1/2 lbs. chopped meat (about 700 grams)
1 cup moist bread crumbs
2 cloves of chopped garlic
1 chopped onion
1 teaspoon of cumin seeds
1 can of tomatoes
1 teaspoon of sugar
salt, pepper
oil or butter for frying 

Method

Mix ingredients and make rolls about 5 inches long in the shape of a sausage. 

(Ma's tip: once you have rolled out the meatballs, place them in the fridge on a tray line with baking paper for around half an hour, to firm into shape). 

Fry in hot oil or butter. 

Prepare the tomato sauce with tomatoes, sugar, salt and pepper. Simmer for about 15 minutes. Add sausages and simmer for 10 minutes longer. 

Serve hot and garnish with fried potatoes or a salad. 

(I also added some freshly blanched broad beans, simply because we have an abundance of them in the garden - and a little chopped parsley. I also used a can of cherry tomatoes - just for a little bit of extra texture. Give them a bit of a squish as you first simmer the tomato sauce, before adding the meatballs). 


Green almonds with tomatoes and peppers (Τσάγαλα γιαχνί)

$
0
0


One of the things I love most about my journey of discovery of Greek cooking is simply the variety of food used. The Greek motto when it comes to food is why buy it when you can either grow it - or forage it for free! There is no better time for foraging when it comes to spring - when there is an abundance of edible wild greens, herbs and shoots - just ripe for the picking. One of the rarer treats from the season are fresh, green almonds - picked before before the shell has hardened and the nut inside is still a little gelatinous capsule.


Fresh or green almonds are called tsagala (Τσάγαλα) in Greek and they are somewhat of an old fashioned food. My husband had never eaten these raw or otherwise, but my parents in law remember them being a real treat as children, where they would compete with other kids in the village to see how many they could pinch off their neighbours trees. I didn't need to pinch my stash of green almonds off my neighbours tree. He happily offered them for free - and I think thought I was quite mad when I said I was going to cook them!


While they make for good snacks, tsagala are also used in a variety of ways - you can simply eat them raw - whole, fuzzy green soft shell and all - or eat just  kernel within. Eaten raw the kernel is mildly tart, with a grassy flavour but also has a sort of soft, fresh sweetness. Cooked, tsagala can be added to braised lamb or goat dishes (in the same way that wild greens would) and finished with avgolemono sauce. This is a big favourite in Crete and you can find the recipe (in Greek) here.  They are also pickled and preserved - both in a savoury or sweet "spoon sweet" method. My mother in law suggested a few of the kernels are very good to add to preserved apricots or figs. I used my batch in another traditional, "main meal"kind of way - simmered with onions, tomatoes and peppers.  The finished texture of the almonds in this dish was not unlike a cooked artichoke heart, but with a little touch of sourness.


Before cooking the green almonds, I used a small serrated knife to clean around the top of the green shell and remove the stem.  These seasonal treats are only available for just a few short weeks in the springtime, so if you happen to live in Sydney - now is the time to buy them - or forage!

Green Almonds with tomatoes and peppers (Τσάγαλα γιαχνί)

Ingredients

about 300g of green almonds, rinsed and drained
⅓ cup extra virgin Greek olive oil
1 large red onion, finely chopped
2 small red peppers, cut into thin slices
4 fresh tomatoes, chopped
Salt and pepper to taste
A pinch of sugar, or to taste


Method 

1. Heat the olive oil in a medium pan and add the onion and cook until soft.

2. Add the peppers and continue to cook until soft.

3. Add the almonds and toss to coat in the oil and then add the chopped tomatoes and their juice.

4. Add a little water (to come about half way up to the almonds in the pan). Season with salt, pepper and add a little sugar if desired.

5. Cover with a piece of baking paper and then add the lid to the pan. Simmer over medium heat until the almonds are soft. You may wish to finish the dish with a squeeze of lemon and serve the dish alongside some rustic bread, feta cheese and olives.


Prawn saganaki (Γαριδες Σαγανακι)

$
0
0


Prawn saganaki is one of those 'holiday to Greece' dishes, which everyone recalls with fondness. It is served in nearly every Psarotaverna (fish taverna) in Greece and a favourite with tourists and locals alike!


It is certainly a favourite in my dinner party repertoire - it makes a great 'shared plate' style entree and is ready from scratch in less than 20 minutes. It also makes for a comforting and colourful mid week dinner - without the normal calories that come with starchy comfort foods.

Some recipes for prawn saganaki call for deglazing the dish with a little ouzo. I prefer to have that on the side and instead, I use a little Metaxa brandy in the tomato sauce, which you could replace instead with a little white wine. If you are a fan of aniseed flavours you can always add a little fennel seed or dill to the tomato sauce base.

Prawn saganaki (Γαριδες Σαγανακι)


Greek olive oil
1 red onion, finely chopped
3 - 4 garlic cloves, thinly sliced
1 tablespoons Greek tomato paste
1/4 cup brandy
4-5 medium fresh ripe tomatoes, roughly chopped
500g green prawns, peeled leaving tails intact, deveined
75g Greek feta, crumbled
1 tablespoon dried Greek rigani
Crusty bread, to serve

Method

1. Preheat oven to 180°C. Heat a non-stick frying pan over medium heat. Drizzle with a little oil. Cook onion until soft and fragrant. Add the garlic and cook until aromatic. Add the tomato paste and stir. Add the brandy and simmer for a few minutes. Add the tomatoes and about 1/2 cup water. Cover with a little baking paper and allow to simmer until the mixture is thick.

2. Spread the tomato sauce over the base of an ovenproof dish. Top with the prawns, feta and rigani - a further drizzle of olive oil. Bake for 10 minutes or until cooked through. Serve with crusty bread.


Vine shoot pilaf (Αμπελοκορφάδες πιλάφι)

$
0
0


Traditional Greek rice pilaf is a serious comfort dish - perfect to be enjoyed all year round. However this version, a vine shoot pilaf called ambelokorfades pilaf (Αμπελοκορφάδες πιλάφι) is just for spring and early summer when the shoots of the vines are still incredibly tender.

I have always loved the way in which traditional Greek cooking uses grape vine leaves in such a variety of ways, but it was a real revelation to have been given a recipe, from a Greek friend in the Ionian Islands, for just the vine shoots themselves. Another novel wild green I would never have thought of using, except for the wisdom of my Greek friends! I love how absolutely nothing goes to waste in the Greek kitchen - and the way in which a few good quality humble ingredients can really make for a very special dish.


This is a great dish to try if you have very productive grape vine at home - or perhaps a neighbour or friend who does - and who won't mind you taking some scissors to it! Even better if you know someone who has a vineyard and is in the process of clipping their vines back for summer. Just be sure to use organic, unsprayed vines.

The flavour of the vine shoots are very delicate and they give a subtle sourness - similar to the flavour of verjuice. The vine tips are also a fantastic alternative to use in this dish in summer, instead of the more common use of lemon - which are starting to head out of season.

This pilaf makes a great main meal, all by itself with just a sprinkling of feta. Alternatively, leave off the feta and serve the pilaf as a side dish to grilled fish or meat.

Ambelokorfades pilaf (Αμπελοκορφάδες πιλάφι)


Ingredients

1 cup long grain rice
1 & 1/2 cups homemade chicken or vegetable stock
Pinch of saffron threads, soaked in a tablespoon of warm water (optional)*
1 tablespoon of olive oil
1 tablespoon of butter
1 small of bunch of tender vine shoots, chopped fine

Method

1. Start by soaking rice in warm water for a few minutes and then rinse well. Set aside.

2. Melt butter in pan, add the oil. Then add the vine tips and sauté for a few minutes. Add the rice and mix well.

3. Cook until rice turns opaque, about 3-4 minutes.

4. Add the chicken or vegetable stock, saffron (and the water it has been soaking in) bring to boil, reduce heat cover and simmer for 15 minutes, or until liquid is absorbed.

5. Remove from heat, cover with towel, and place lid over towel. Let sit for 10 or so minutes. Use a fork to mix the vine tips through the rice. You can serve with a sprinkling of feta as a main meal, or leave off the feta and serve as a side dish to grilled fish or meat.


Tomato Fritters - domatokeftedes (ντοματοκεφτέδες)

$
0
0


So it's the first day of Summer here in Sydney - and is shaping up to be another 30C+ day. When it's so hot, I rarely feel like cooking much in the evening after a day in the office and a steamy city commute. However, my efforts can stretch to chopping a few tomatoes and whipping out the fry pan for a batch of tomato fritters, called domatokeftedes (ντοματοκεφτέδες).

These brightly coloured delights are a speciality of Santorini and they are traditionally made with the island’s native tomato.  Santorini is also home to amazing fava (yellow spilt peas), capers and wine. Happily you can now buy the crisp white wines from Santorini easily in Australia - and it's a perfect match for these domatokeftedes. Another essential for a warm evening and eating outdoors!

My version of domatokeftedes uses very ripe Roma tomatoes and I have flavoured them with plenty of mint - both dry and fresh. I use a dried wild mint from Greece, which is incredibly aromatic (You can buy a similar wild mint from Greece here). You could really add any herbs you like - dill, parsley or basil would all work nicely with the tomatoes. However, I can't help but feel there is something just so summery about the combination of the tomatoes and mint.

These fritters can be served as part of a mezze plate, however I think that they are delicious dipped into tzatziki - or given a little squeeze of lemon. For a simple dinner, I serve them with some sliced cucumber from the garden, avocado and Thassos olives - liberally doused with some good Greek wine vinegar and a touch of olive oil.


Tomato Fritters - domatokeftedes (ντοματοκεφτέδες)


Ingredients 

300g ripe roma tomatoes, finely chopped
1 small red onion, finely chopped
100g (1 & 2/3 cup) self-raising flour
2 tbsp fresh mint leaves, chopped
1 tbsp dried mint leaves
olive oil, to shallow fry

Instructions

1. Combine tomatoes, red onion and herbs in a large bowl and season with salt and pepper; knead well. Then add the flour to the bowl and mix well -  the batter will be fairly sticky.

2. Heat about an inch of olive oil in a large, heavy-based frying pan over medium–high heat. Working in batches, scoop up a spoon of the mixture and using another spoon gently drop into the pan and lightly flatten. Cook for 2 minutes each side or until golden brown and cooked through. Drain on paper towel, season with salt and serve with lemon wedges and tzatziki.


Greek pickled calamari (καλαμάρι τουρσί)

$
0
0


I love making a range of Greek style pickles - called toursi (τουρσί) in Greek. They are especially great in summertime, when after a day spent at the beach you get that urge for a chilled ouzo and meze. It's so nice to know that you have little jars of toursi tucked away in the fridge or the pantry and the only effort required is opening the jar!


The pickle recipe I am sharing today is for calamari toursi (καλαμάρι τουρσί). It makes for a great meze spread with a little feta dusted with riagni, some simple fava (a yellow split pea dip) topped with sweet red onion and capers - and a little fresh, crispy salad on the side, such as a purslane and marinated olives. Pop open the jar of calamari and in minutes you have some lovely mezethes to enjoy with a chilled ouzo in the garden on a warm, dusky summer evening. If you skip the feta you also have a Greek Orthodox fasting friendly meal for those few weeks before Christmas - or Easter.

If you are interested in making other Greek style pickles, you can find my recipe for octopus toursi here and for simple mixed vegetable toursi here.

Greek pickled calamari (καλαμάρι τουρσί)


Ingredients

3 - 4 whole calamari cleaned and sliced into meze friendly sized pieces (or you could substitute with calamari tubes, sliced) 
2 garlic cloves, crushed
2 bay leaves 
1/2 cup Greek olive oil
1/2 cup of good quality Greek wine vinegar
1 tsp. dried Greek anise seeds  
1 tsp. alleppo pepper flakes 
1 tsp. fresh rosemary leaves, finely chopped 
1 tsp. whole black peppercorns 
sea salt, to taste 
1 – 2 small sterilized jars


Instructions: 

1. Place the pieces of calamari in a medium saucepan with just a little water (about 1/2 cup). Cover and simmer the calamari in its own juices until tender (about 30 minutes).Remove from the heat, drain the calamari and set aside. 

2. In a separate pot, add the Greek wine vinegar and add bring to the boil over medium heat. Turn the heat off, add the garlic, bay leaves, anise, alleppo pepper, rosemary, black peppercorns, salt and olive oil and stir well to combine. 

3. Place pieces of calamari in the jars and then pour the pickling liquid  over the top and into the jars (ensure the calamari is covered). Leave to marinate in the refrigerator for 12 hours before using. Stir occasionally. Store in your fridge for up to 1 month.


Citrusy Ionian Style New Year Cake - Vasilopita (Βασιλόπιτα)

$
0
0


As 2015 comes to a close,  I am so thankful to all who have taken an interest in this little blog over the last year. It is so wonderful to be able to share something I love to do with you and I wanted to say thank you to those reading in Australia, Greece, Cyprus and all over the world. What better way is there to say thank you than by offering up some baking goodness? 


In Greek homes, when the New Year arrives, it is also the feast day of St Basil (Aghios Vassilios) and it is traditional to celebrate the day with a "vasilopita" - a bread or cake which has a foil wrapped
coin hidden inside. In this post, I am sharing with you the cake version - inspired by the flavours of the Ionian islands, with plenty of citrus and a little splash of brandy.  On New Years day, the family gathers around the table and the head of the household will make a sign of the cross over the bread or cake and turn it three times - once for the Virgin Mary, once for Christ and once for the house. A piece of the bread or cake is sliced and passed to each person at the table - traditionally from oldest to youngest. It is said that whoever finds the coin, will have good luck and good fortune for the year ahead.

While growing up, I experienced a similar tradition - except that the lucky coin was placed in the Irish Christmas pudding. Although my grandmother and aunts went a few steps further and would also add, according to tradition, a tiny silver wishbone (for good luck), a silver thimble (for thrift), a gold ring (for marriage) and an anchor (for safe harbour). Great Aunty Pat would also keep topping up the pudding with a full bottle of Irish Whiskey - so there was a fair bit of good cheer for all on Christmas day, coin or no coin. Given how many trinkets were in those puddings, it remarkable nobody ever ended up choking. The approach to the Christmas pudding was tentative nibbling with a delicate fork - and the same approach is recommended for a vasilopita.  In my vasilopita this year, I have placed a euro coin instead of an Australian coin  - I am hoping the lucky family member to find it will not only have good fortune throughout the year but also a holiday to Greece.


Citrusy Ionian Style New Year Cake - Vasilopita (Βασιλόπιτα)


Ingredients 

250g butter, softened, chopped
1 tbsp finely grated orange rind
1 tbsp finely grated lemon rind
1 tbsp Greek brandy
1 & 1/2 cups caster sugar
4 eggs
1 & 1/2 cups self-raising flour
1/2 cup plain flour
1/2 cup orange juice
1/4 cup lemon juice
* one very well cleaned foil wrapped coin

Instructions

1. Preheat the oven to 160°C. Grease a deep 20cm-round cake pan; line the base and side with baking paper.

2. In a large bowl, beat the butter, rind and sugar until light and fluffy. Add eggs, one at a time, beating until just combined.

3. Fold in the sifted flours, juices and brandy in two batches. Eg. Slowly fold a in the self rasing flour bit a time at a time, then some of the juice, then some more self raising flour. Aim to start and finish with the flour. Spread half of the mixture into the prepared pan and then add the foil wrapped coin. Spread the rest of the mixture over the top.

4. Bake for about 1 hour 10 minutes. Stand the cake in the pan for 10 minutes before turning onto a wire rack to cool. Decorate with icing sugar and if you wish, you can add the the upcoming year in icing or whatever takes your choosing.

Slices of vasolopita are best served with some good quality brandy on ice, a vinsanto from Santorini, a sweet dessert wine from the Island of Samos or if you prefer an aromatic cup of thick Greek coffee.


Once again, lovely readers, I thank you for your support throughout 2015. I hope that 2016 brings you happiness and that in the year ahead the hearts and thoughts of all of people that share the world are filled with peace, tolerance and kindness.

In my kitchen: January 2016

$
0
0


Καλή Χρονια! Kali Xronia – happy new year!!


Καλή Χρονια and happy new year to our new host of 'In my Kitchen"Maureen and the same wishes - plus a big thank you to the creator of this series and host for many, many years, Celia. A happy new year also goes to you lovely readers and all of my fellow 'In my kitchen' bloggers.

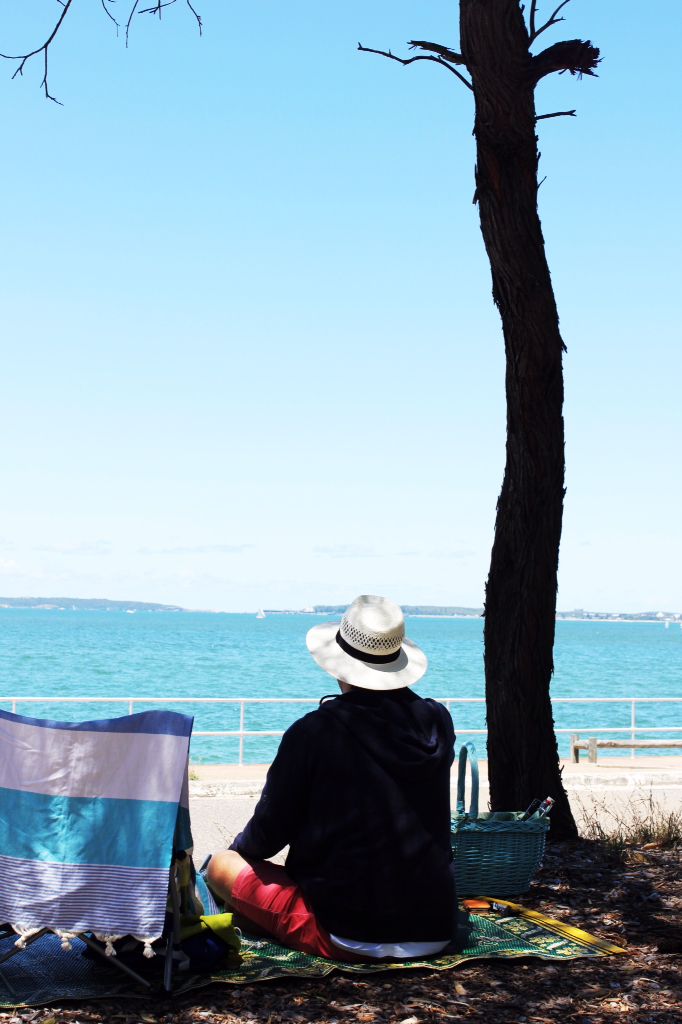
The sentiments of Francesca, of Almost Italian are ringing true in my kitchen for the start of the new year. It's been a time for sea breezes and taking a break from anything too frantic in the kitchen department. This last week, post Christmas, has been about enjoying simple Greek flavours, fresh seafood and delicious summer vegetables.

In saying that however, the creation of our Christmas feast for 2015 - this year hosted by my mum and myself - was not exhausting in the least. My very clever Mr K had presented me with an early leave pass from work this year, in the form of a few beach filled couple of days in mid December. It was all heavenly 'beach, eat, sleep repeat' - and then I sailed (with plenty of beach inspired calm) into the pre-Christmas week to have a really enjoyable couple of days cooking and preparing for Christmas with my beautiful, zen like parents.

In fact, while I was totally spoiled with some thoughtful and generous gifts this year, the best gift was having some really happy and joyful times with my whole family - Mr K, my two sets of lovely parents, my aunt and uncle, cousins and my gorgeous Greek family. A big highlight was celebrating Ba's (my Greek dad's) 89th birthday on boxing day and seeing him preside over the cutting of the vasilopita on New Year's Day. My mum said it best in her Christmas card to my parents in law this year, when said that "our beautiful Greek-Australian family has enriched our lives so much".

And just in case you were wondering about who got the coin in the vasilopita (see my last post) - it was indeed Ba, to great applause and big 'ear to ear' smiles from the whole family. My sister in law, Joanne, also made a really delicious almond and coconut flavoured vasilopita (I'll be asking for that recipe soon) and Ba's namesake, my beautiful niece Sienna, also had the good fortune of finding the second coin for 2016. If the saying is true that you start the first day of the new year as you wish to see the year continue, then 2016 is going to be a truly wonderful year.


In my kitchen this January 2016...

...I have a couple of snapshots of Christmas day pinned on our fridge. A great way to reflect on such a happy day for many more days to come.


In my kitchen this January 2016...

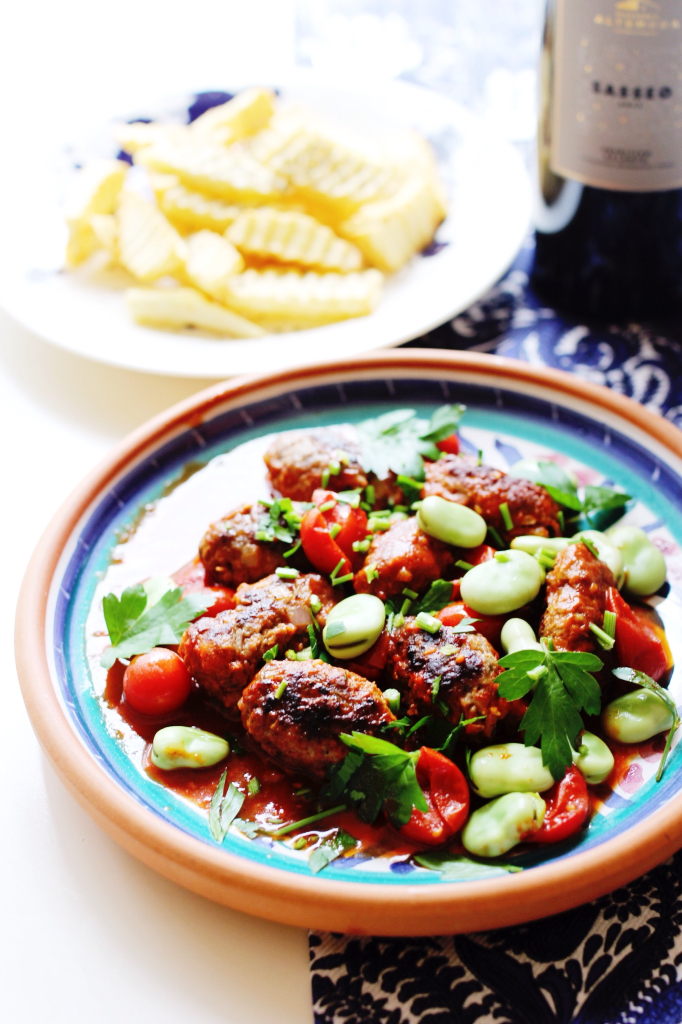
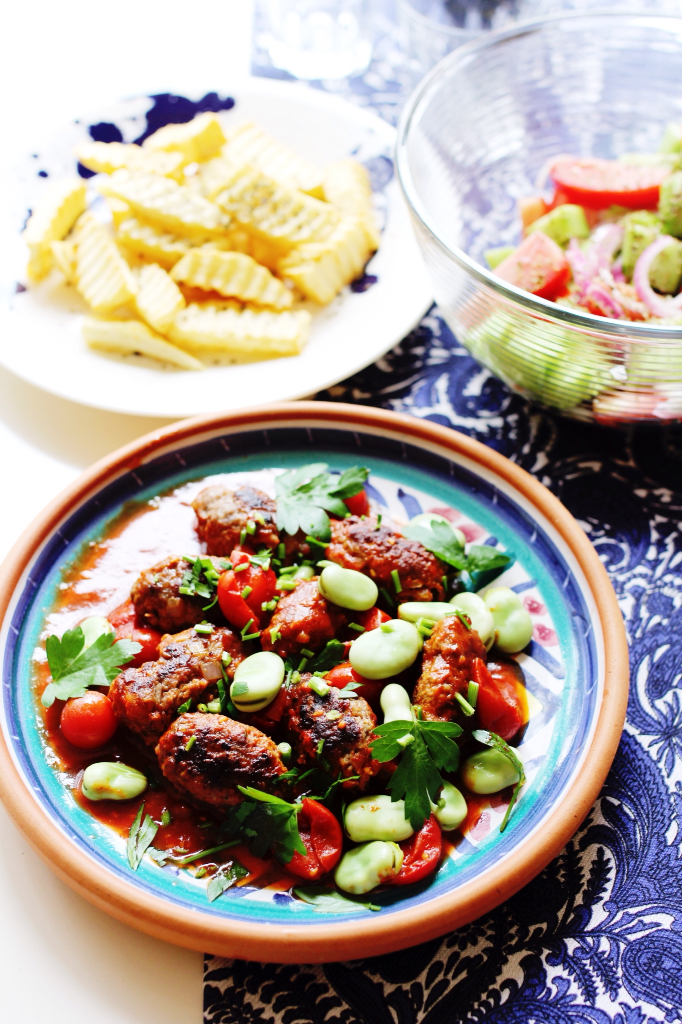
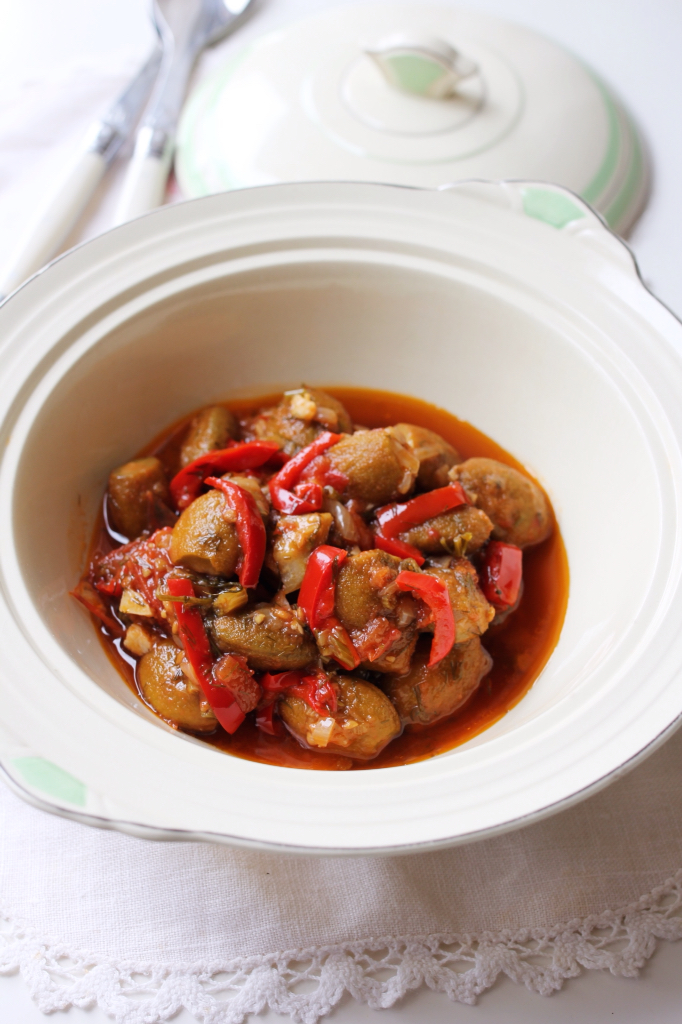
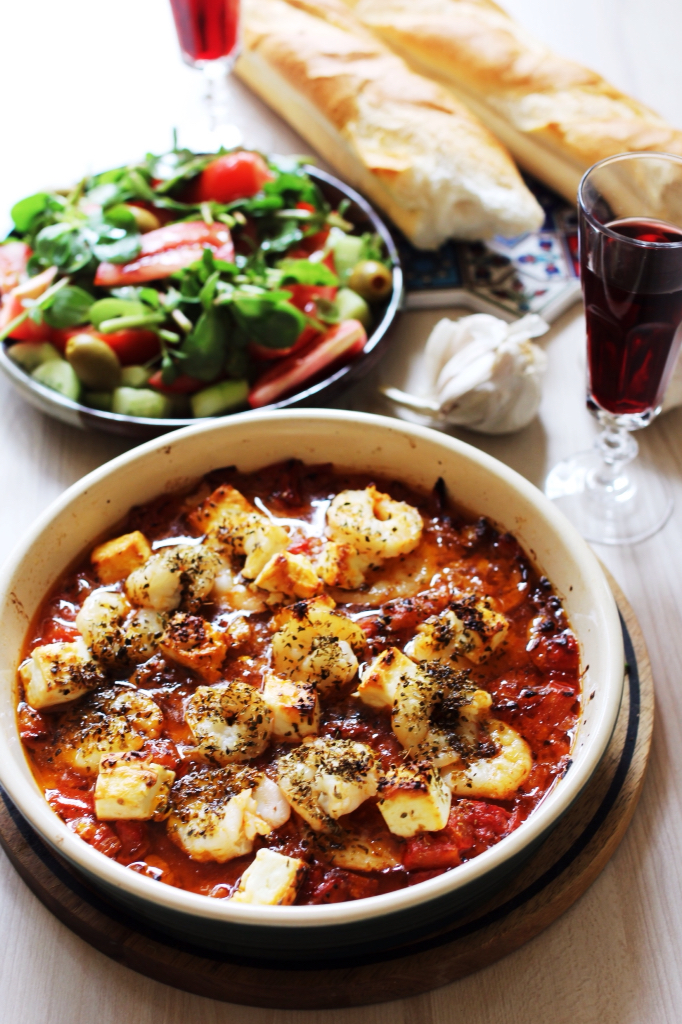
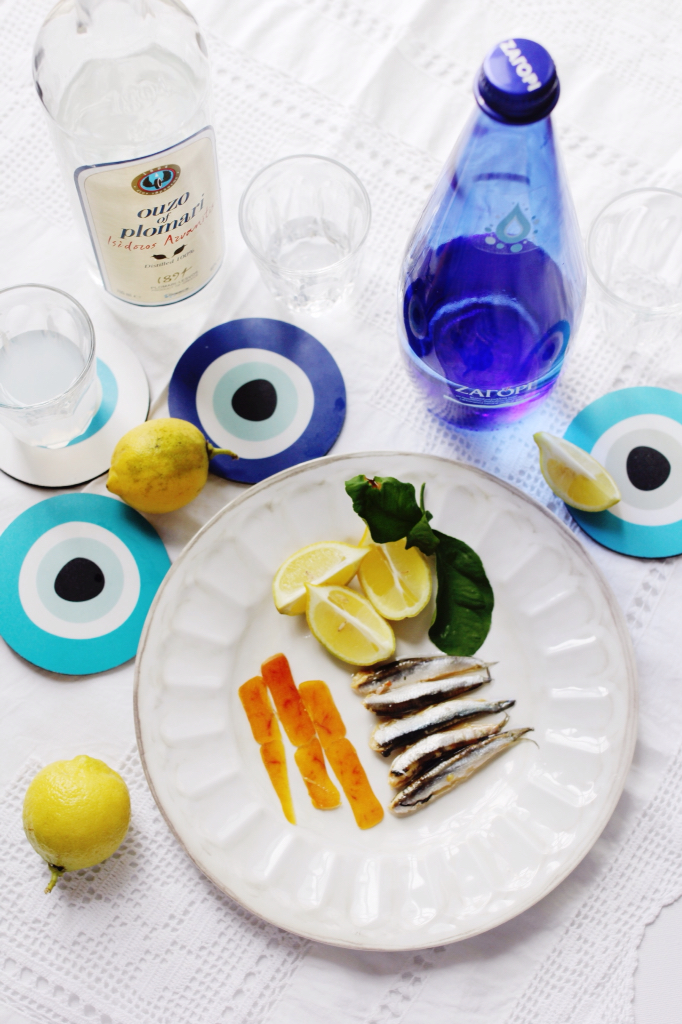
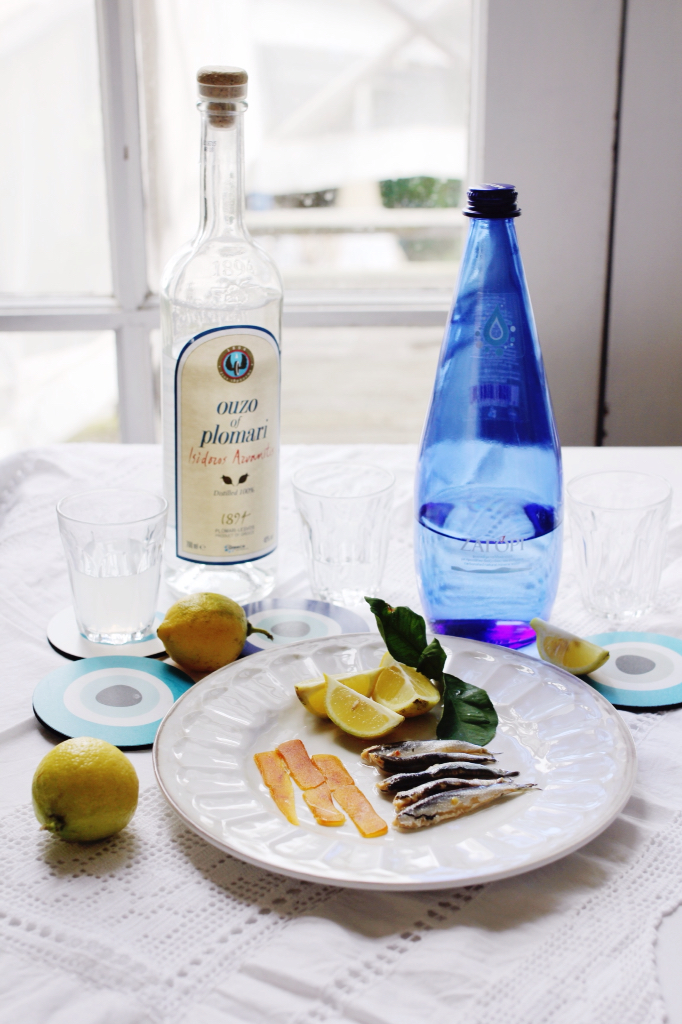
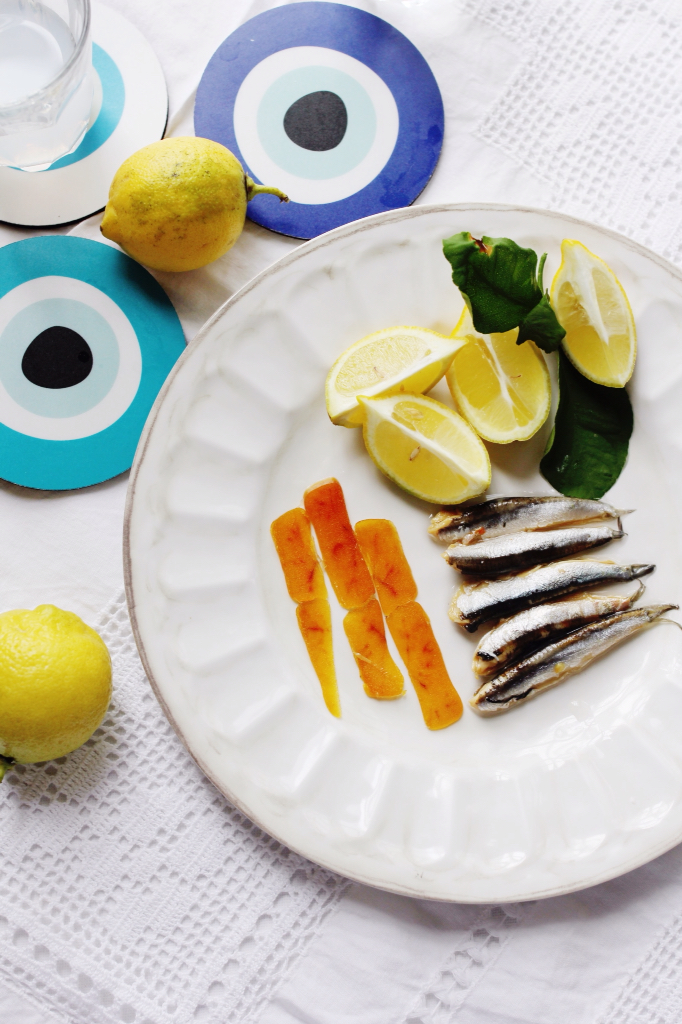
...There is a plate of those cooling, extremely low effort summer mezedes I was talking about! Perfect for when you come home from a day at the beach - exhausted from doing nothing but swimming and sitting under the shade of a pine tree taking in the sea breeze. No matter how relaxed I am, I have been able to summon up the energy to place a few anchovies (which I had marinated in herbs and olive oil in the lead up to Christmas) on a plate and slice some wafer thin pieces of Avgotaraho.


In case you are wondering, Avgotaraho is the Greek name for these little wafer thin slices (which I think look a bit like panes of salmon coloured stained glass, flecked with saffron threads) and they are actually the salt cured roe of a mullet. It is a real delicacy in Greece and the whole of the mediterranean. Italians call this “Bottarga” and it features prominently in both Sicilian and Sardinian cooking. In Greece it has been eaten since Byzantine times and Mr K has been channeling all of his ancient Greek culinary heritage enjoying this local Australian version (although it was made by a Kastellorizian gentleman, as the fishmonger and one of his older Greek 'papou' clients informed us). All it needs is a judicious drop of good Greek extra virgin olive oil and squeeze of lemon. It also has to be enjoyed, of course, with a glass of Ploumari Ouzo (one of Mr K's Christmas gifts, which he was much delighted with) and splash of very, very chilled water and ice.

While I love the opaque colour and the smell of ouzo, despite all my Hellenic leanings, I can never seem to get through a glass off the stuff - no matter how good quality the ouzo is or how small the glass, or how strong the encouragement. It strange, as I love aniseed and fennel in all its other forms. Maybe one day my taste buds will get there. But for now, I've been enjoying another chilled Greek treat and a little something to counter balance all that French champagne at Christmas, a natural mineral water from the beautiful Greek region of Zagori. A real treat indeed, given it is nearly impossible to find here in Australia. The fantastic evil eye or 'mati' coasters were also a Christmas gift Mr K received and they have certainly bought a real Hellenic touch to cocktail hour at our house.


In my kitchen this January 2016...

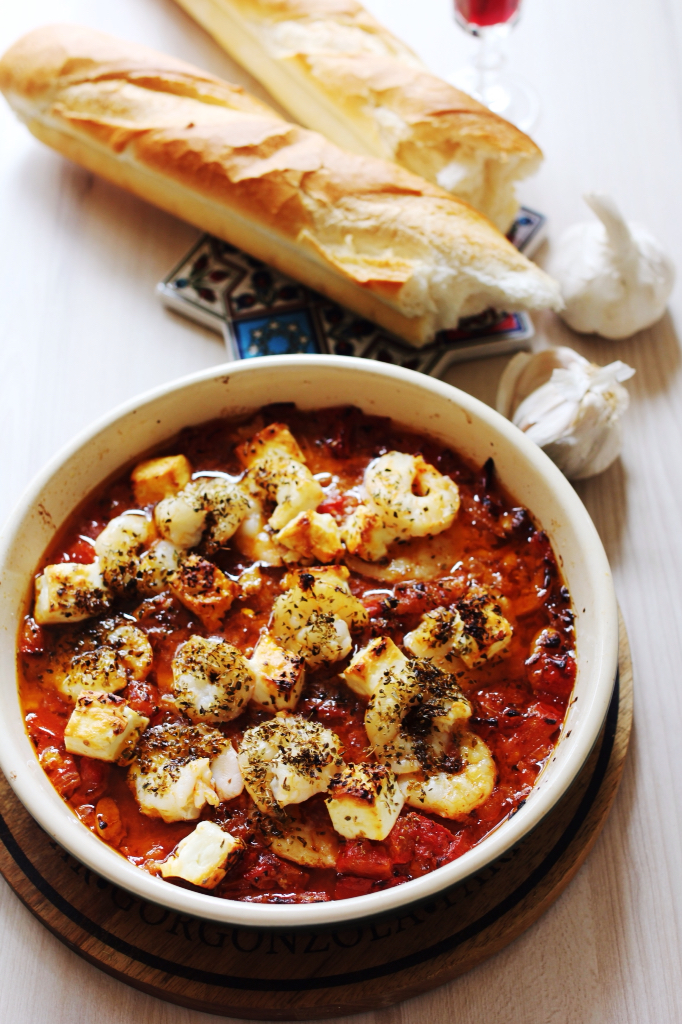
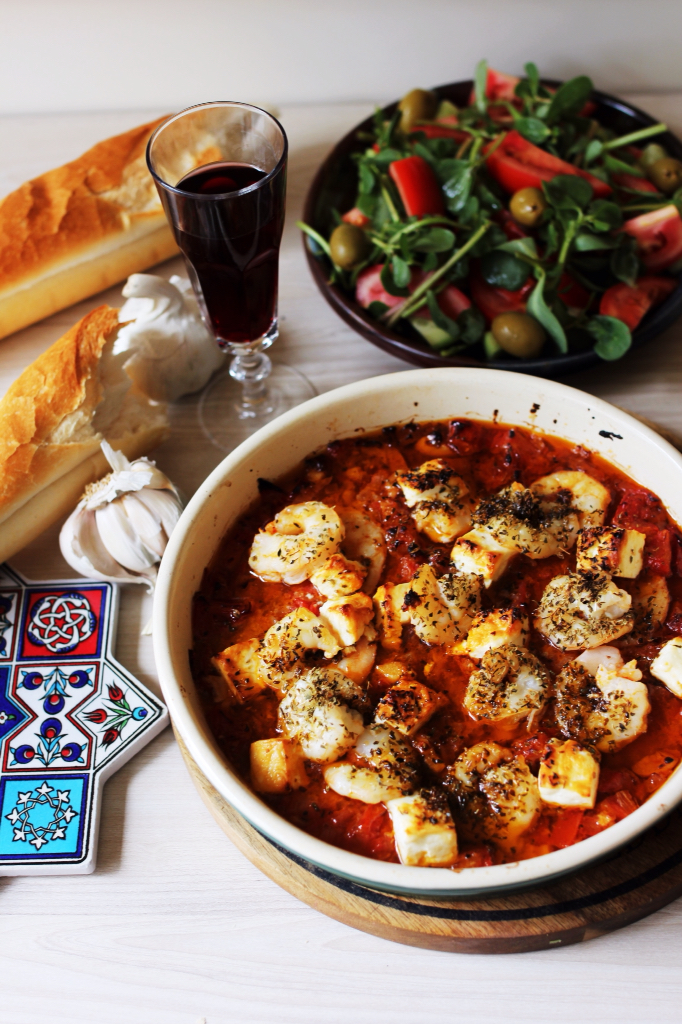
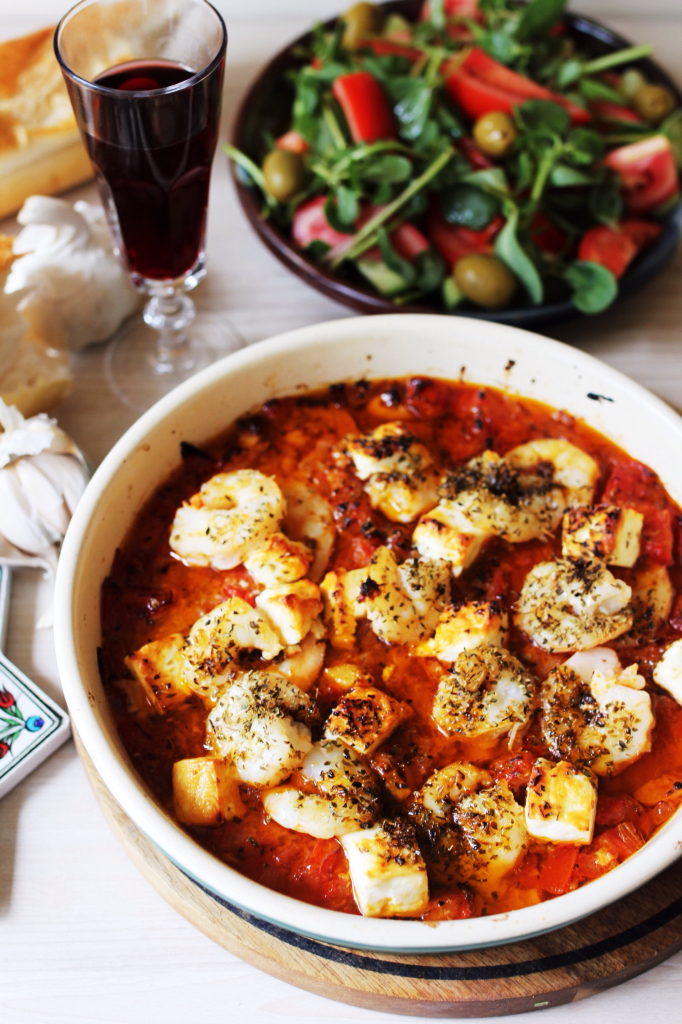
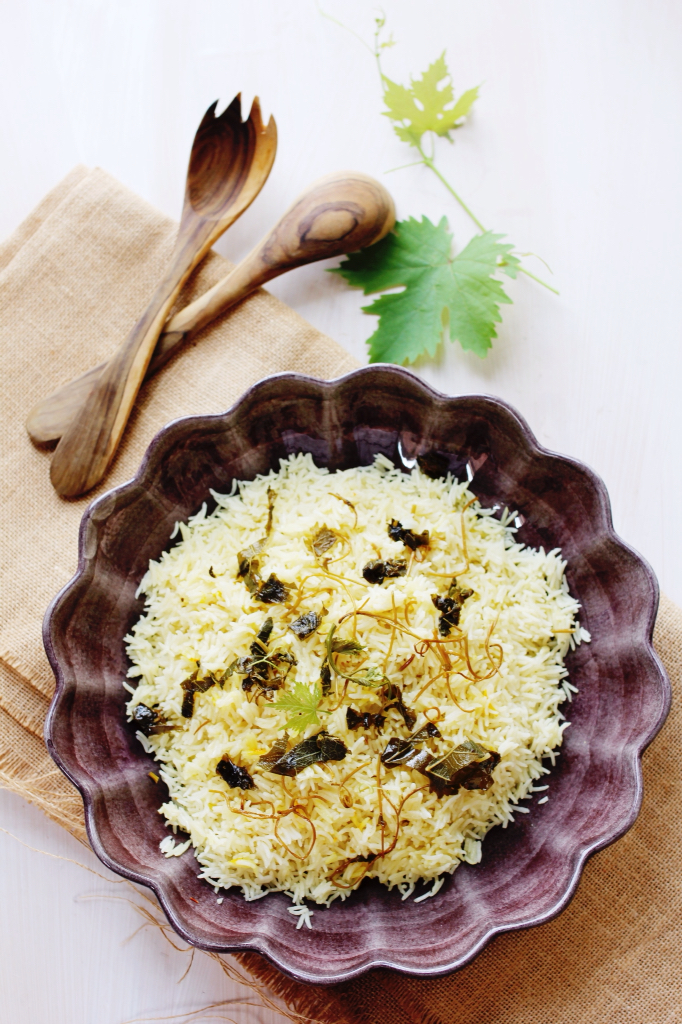
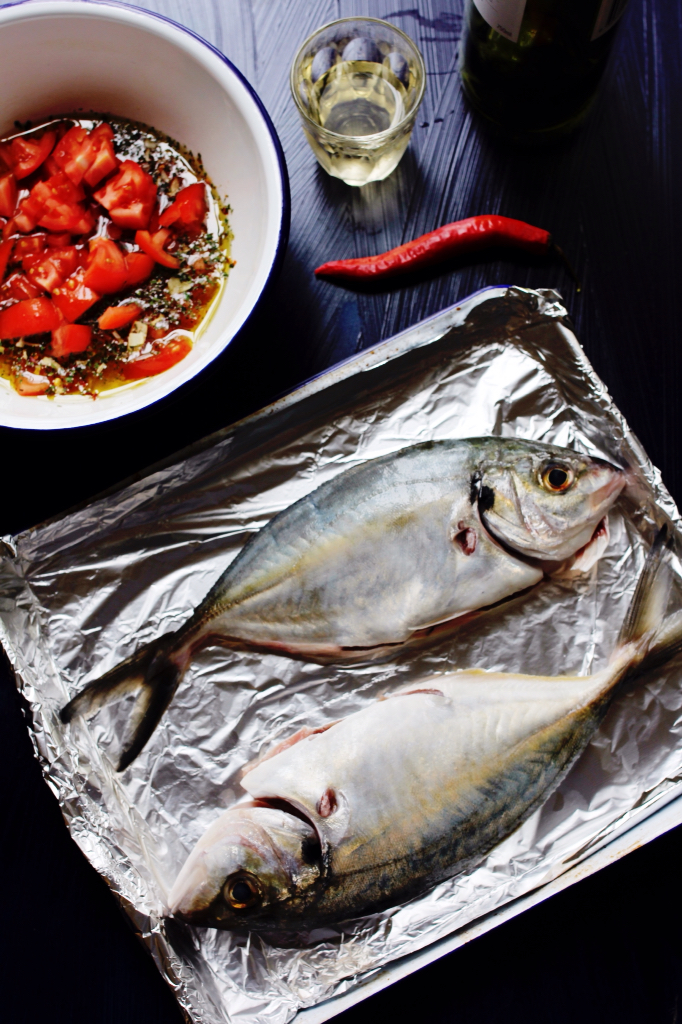
... There has been some trevally. These beautiful fish have a firm, dense and slightly oily meat. As such, they benefit from having some robust flavours in the mix to compliment their oily flesh. Trevally (but not silver trevally) are also recommended as a better choice, when it comes to the issue of sustainability. We have enjoyed these lovely fish simply grilled on the BBQ, along with a twist on the traditional Greek lemon and olive oil dressing - a French dijon mustard, lemon and olive oil dressing! This mustard sauce is normally reserved for pork dishes, but it really works with the meaty flavour of the trevally.


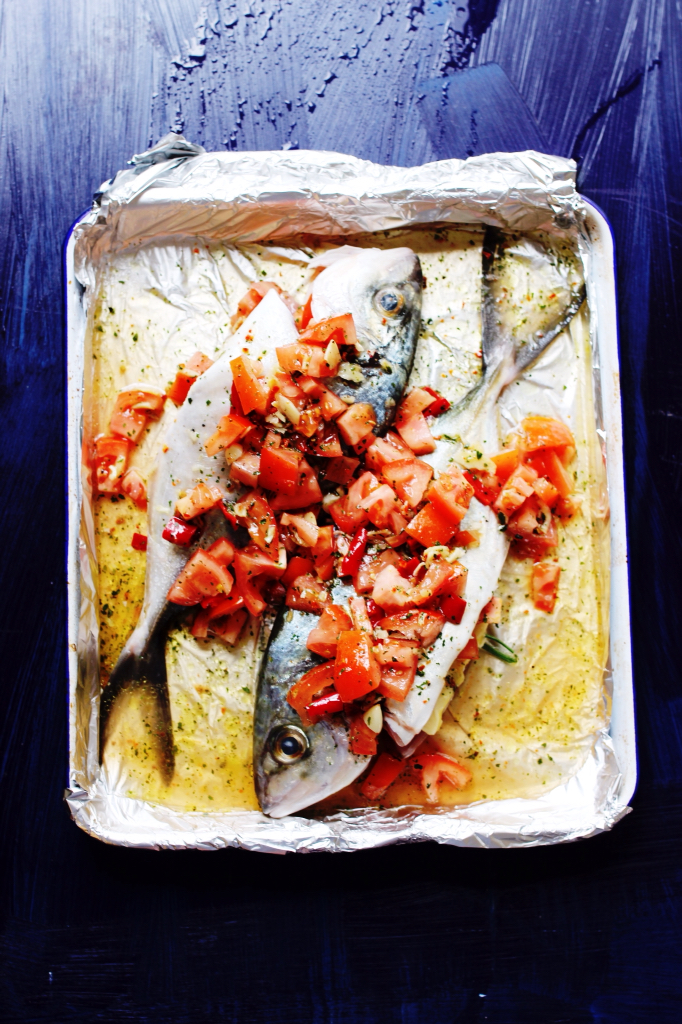
We have also baked the fish in a Greek island way, with plenty of garlic, tomato, chilli and white wine - finished with some garlicky breadcrumbs. The finished dish is really something to savour over a long and relaxing lunch - and the perfect way to cook this sort of fish or any kind of mullet or even an Australian salmon (both sustainable choices). This method of preparing the fish is also really low effort - no pre-cooking of the tomato sauce is required, as there normally is for the more classic baked Greek fish dish - psari plaki. Just add all the sauce ingredients to a bowl, mix and then spoon over the fish. And vo-ila or should I say ...oriste!

Baked fish in the Greek Island Style


You need:

Two whole trevally or grey mullet (about 1kg)
1 cup of toasted fresh sourdough breadcrumbs

For the sauce:

100ml of extra virgin olive oil
1 glass of white wine
2 garlic cloves, finely chopped
1/2 cup fresh dill, finely chopped
1/4 cup parsley, finely chopped
1 red chilli, roughly chopped and de-seeded if you don't want the finished dish to hot
400g grams of ripe tomatoes, diced
salt and pepper

Method:

1. Mix all of the sauce ingredients (leaving aside a little dill to tuck into the belly of the fish later) in a bowl, season to taste and set aside.

2. Preheat the oven to 190C. Clean/trim the fish, rinsing well and pat dry. Place the fish on an oiled baking dish or tray and season with salt. Tuck a little bit of the reserved dill into the belly of the fish. Spoon the sauce over the fish and then place in the oven, uncovered, to bake for about 15 minutes.

3. Remove the fish from the heat, turn over and then spoon over the sauce from the tray. Top with the toasted breadcrumbs and bake uncovered for a further 20-25 minutes. Serve with lemon wedges and some boiled potatoes or home made chips for a simple summer meal.


Finally, in my kitchen this January 2016...

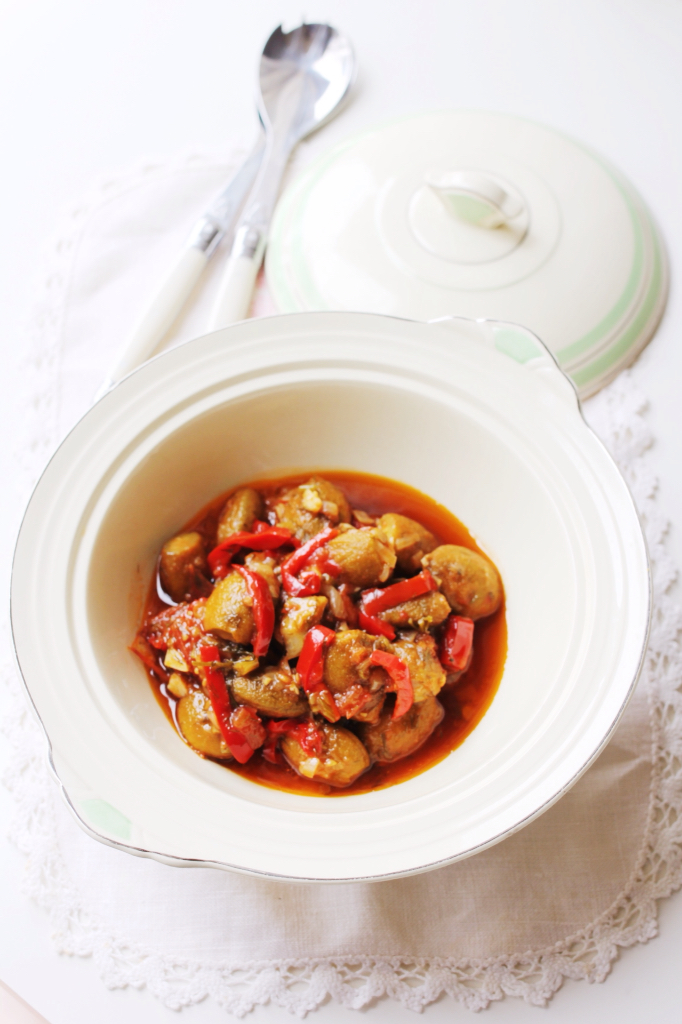
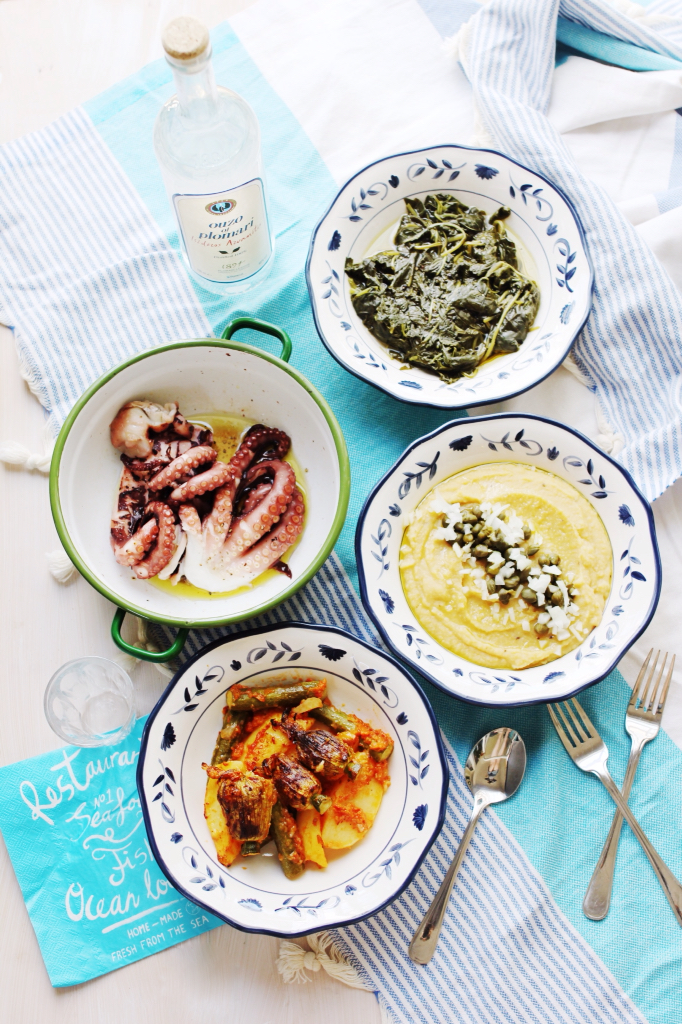
There has been plenty of items flowing from the fridge to the picnic basket, for beach side soirees done the Greek way. After indulging in perhaps a little to much meat over Christmas - from roasted duck with fresh cherries to lamb on the spit, I have been craving my much loved wild greens. So along for the ride to the beach there has been plenty of horta - boiled wild greens dressed in extra virgin olive oil and lemon, in the form of the first the season vlita (find our more about this green here) and some slow cooked yellow split peas, called fava in Greek, dressed up with some zingy capers and chopped red onion.

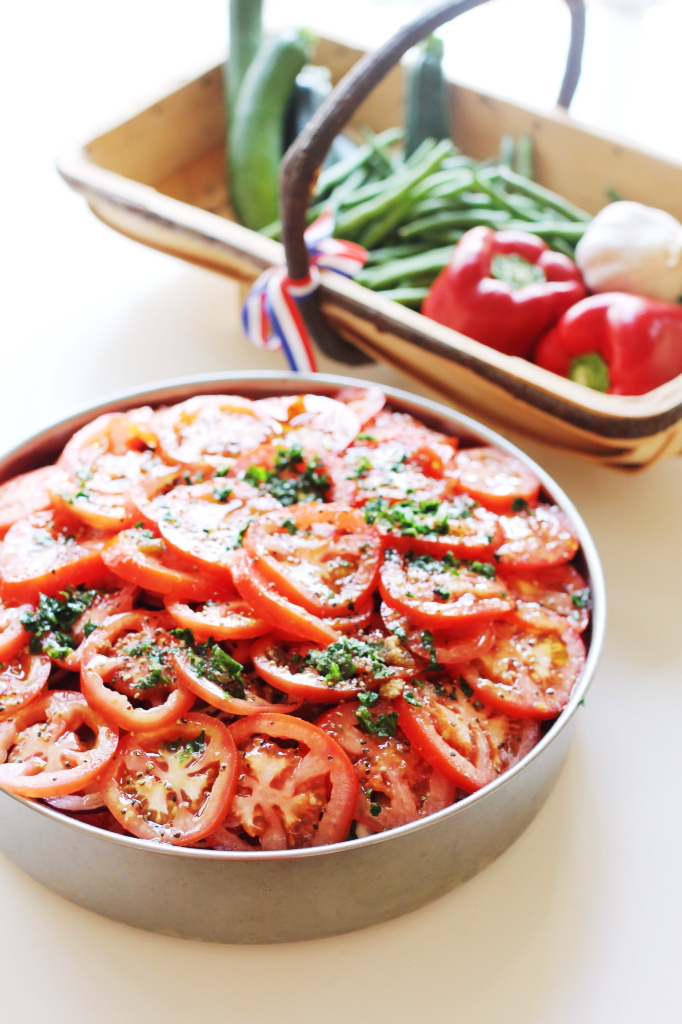
Upping the vegetable quota has also been some rice and herb filled zucchini blossoms - a real summer treat, baked in fresh tomato sauce. The tomatoes have come from the early crop of ripe summer tomatoes growing in our garden. For good measure, I also added some small baby zucchini and a few 'comforting' potatoes to the zucchini blossoms. Last but not least for our recent beach picnic there was also some octopus, boiled at home to release all of its purple juices and then taken down to our local beach, to be grilled over charcoal. If you could bottle the smell of summer it would have to be salty sea breezes, charcoal and grilling octopus!


So that is my kitchen for this January! Thank you for taking the time out to see what is in my kitchen this month and please make sure to visit our host Maureen at the Orgasmic Chef and see not only what is in her kitchen this January, but lots of other kitchens around the world!!

Cooking with Tselementes: rizogalo (ριζoγαλο)

$
0
0


It would be safe to say that Rice Pudding is an ultimate comfort food around the globe. Nearly every culture has their own variations on this luscious, nursery-food style treat. In Mr K's family home, when treats were on offer - they often came in the form of Greek rice pudding, called rizogalo (ριζόγαλο).

Rizogalo is a creamy, mouth-filling delight of sweetened rice, full cream milk and the subtle flavourings of cinnamon and lemon. When served warm, it is rich and comforting - like a big sweet hug in a bowl. Perfect in Autumn when the weather starts to become a little cooler. But when the weather is warmer, rizogalo is equally good served cold. Despite it's carby underpinnings, served cool rizogalo is surprisingly refreshing, especially when dusted with an extra large dose of cinnamon.


A few weeks ago, I posted a recipe from the holy grail of Greek cooking, Tselementes. In that I post, (which you can under the "Tselementes" tag on the recipe index page opposite right) I promised to slowly work my way through the book and share with you my efforts in respect of Mr Tselementes' recipes - tweaked every so often with the wise counsel of Ma, having resulted from her 50+ years experience cooking with Tselementes.

So, without further delay, in the post I give you Mr Tselementes' recipe for  rizogalo (ριζόγαλο) - served along with my own twist - homegrown springtime mulberries that had been preserved in a light honey syrup.

I use an Australian Fowlers Vacola preserving method - simply because that is the one that my grandmother used and she had given me lots of her old preserving bottles when she 'retired' from the art of preserving. A good store bought substitute for the mulberries would be to seek out your local Turkish or Middle Eastern grocer for a jar of good quality mulberry jam (if you are in Sydney try Gima supermarket in Auburn).


Mr Tselementes' Rizogalo (ριζόγαλο)

Ingredients 

8 cups of milk
1 cup of rice (I used Arborio rice)
1 & 1/2 cups of caster sugar
1 lemon, rind only
1 tablespoon of cinnamon
2 egg yolks
1 teaspoon of cornflour

Method 

1. Put the milk into a large pot and bring to the boil.

2. Wash the rice and add to the milk. When the milk comes to the boil again, reduce the heat and simmer for about half and hour, stirring occasionally.

(Ma's tip - keep checking and stir fairly often so that the rice does not stick to the base of your pan)

3. Add sugar, lemon rind and combine well, simmer for 8 - 10 minutes longer.

4. If desired, add 2 egg yolks, mixed with a little cold milk and a teaspoon of cornflour. Combine well and simmer for a few minutes longer.

5. Serve, sprinkled with plenty of cinnamon.


Mulberries in honey syrup

I use an Australian Fowlers Vacola "Simple Natural Preserving" method.

To make the honey syrup, I used a Greek thyme flavoured honey.

I dissolved 1 cup of honey in 1 cup of water - and allowed to cool. Then I followed the Fowlers Vacola bottling and processing steps.

For a demonstration of how to use the Fowlers Vacola preserving method see: https://fowlersvacola.com.au/demos/preserving.


Horta Tsigariasta with clams (Χoρτα Τσιγαριστα με αχιβαδες)

$
0
0


Horta, as you know, is something that is a firm staple on the table at 'Casa Mulberry'. It is also something that my mother in law always has on the menu.  Tsigariasta (Τσιγαριστα) means to braise or sautee a selection of wild greens in good Greek olive oil. 

The selection of greens usually depends on what is around - now that it is summer in Sydney, that means plenty of purslane (andrakla/ glystrida αντράκλα or γλυστρίδα) and amaranth (Vlita βλήτα). Given the abundance of juicy late summer tomatoes, these are also added to the dish. Ma's twist to the classic tsigariasta is to add some small clams or pippies, which makes for a rich dish with a good hint of vegetal bitterness from the greens. 

I remember the first time Ma made this dish for me. I had called in for an afternoon visit and my niece and nephew were also spending some time with their Yiayia. Ma served the four of us pipping hot bowls of this dish, with home cured olives, feta and delicious wholemeal, home style bread on the side. It was such a joy to see two little ones happily wolfing down this nutrient packed dish, with their sophisticated pallets at such a relatively young age - my nephew happily asking if there were seconds on offer. 


Horta Tsigariasta with clams (Χόρτα Τσιγαριστά με αχιβάδες)


Ingredients

2-3 onions, chopped (at least one red and one brown)
2-3 leeks, chopped finely
2 cloves of garlic
Pinch of dried chilli pepper flakes, to taste
About 1 kilo of greens - 1 bunch of green amaranth, 1 bunch of red amaranth, 1 bunch of purslane
1 glass of freshly grated tomatoes
1 glass of water
1/2 kg of small vongole clams or pippies
Olive oil
Salt and pepper, to taste

Method

Here’s how Ma makes her Tsigariasta.

1. First, you must start by scrupulously washing your clams and wild greens, using only the tender leaves and stems of the amaranth. Discard any woody or tough stems, or any yellowing leaves.

2. Boil a very large pan of unsalted water and tip the greens into it for five minutes. Meanwhile, chop the leeks, onions and garlic finely. In a separate pan, begin by sauteing the onion and leek in a lot of olive oil. When it’s golden, add the garlic and cook until it is fragrant.

3. Next add the tomato, stirred well and then add the well drained greens, together with the chilli to taste. You may want to add just a touch of water, so that the greens don't stick to the pan. Cover the pot and let it all simmer on a low heat for about 10 minutes. Then, add the well cleaned clams and cover the pot again, simmer for a further 10 minutes until the water has evaporated and you are left with a thick, olive oil rich sauce.


Black eyed peas with fennel (Μαυροματικα με μαραθο)

$
0
0


A few months ago, I wrote about my mother in law's incredible repertoire of legume dishes. Ma certainly prefers to use black eyed peas, lentils, split peas and chickpeas in this stable of recipes to any other kinds of legumes. Common to all of these recipes is the first, traditional step of soaking the legumes for a long time - at least overnight, combined with long, slow cooking process.

Ma recently shared the recipe for black eyed beans (μαυρομάτικα), sometimes known as 'louvi xero', swimming in bowl of flavoursome tomato sauce topped with a very generous drizzle of olive oil (which you can find here).

This recipe is similar - again using tomatoes as a flavoursome base, which is perfect if, like me, you have the last of summer crop of tomatoes on hand. However, this dish is scented with anise from the use of plenty of fennel.  It is best served with plenty of feta on the side, or you could even have a little thick Greek yoghurt dolloped alongside - spiked with a little garlic if you prefer.


Black eyed peas with fennel (Μαυρομάτικα με μάραθο)

Ingredients 

2 cups dried black eyed peas
250g fennel (leaves and stalks), finely sliced
2/3 cup of extra virgin Greek olive oil
1 onion, grated
4 ripe tomatoes, chopped (peeled and seeded if you prefer)
1 bay leaf
1 teaspoon of aleppo pepper flakes
salt and pepper to taste

Method 

1. Drain off the peas which you have soaked overnight. Put them into a pot, with enough water to cover and bring to the boil. Reduce heat and dimmer for about 1 hour, or until they begin to soften. Drain well.

2. Blanch the fennel in a pot of boiling water and then drain well.

3. Heat the olive oil in a large pot and add the grated onion. Cook over a low heat, stirring occasionally until soft. Stir in the peas, chopped tomatoes, bay leaf, aleppo pepper and simmer for about 30 minutes.

4. Add the fennel, season to taste and simmer for a further 10 to 15 minutes. By this time, you should have a thick sauce. Keep simmering for a little longer if the sauce appears watery.


Favokeftedes (φαβoκεφτέδες)

$
0
0


Over the last few days, Mr K and I have been doing a little holiday planning, getting inspired for our visit to Greece this summer. While Mr K is planning our itinerary around sensible things like ferry connections and architectural points of interest, I have been guided by regional cooking traditions and specialty produce of Greece.

So, having spent a few days reading about the famed yellow split peas of Santorini, called 'fava' (and not to be confused with broadbeans), I just had to get into the kitchen and make some Santorini inspired dishes. In this case a big bowl of traditional warming fava - a split pea puree and some favokeftedes, which are best described as a split pea croquette. I made this dish with Australian grown yellow split peas, which were excellent quality, but I can't wait to try this dish again in a few months time, with the fava grown on the spectacular Greek island of Santorini.


Favokeftedes (φάβoκεφτέδες)

Ingredients

250g yellow split peas
1 onion, peeled and grated
bunch of parsley, finely chopped
Bunch of mint, finely chopped
1 teaspoon of rigani
Zest of 1 lemon
3/4 cup of breadcrumbs
2 eggs, beaten
Pinch each of salt and freshly ground black pepper
All-purpose semolina flour, for coating the croquettes
Olive oil, for frying

Method

1. Rinse the peas in a sieve under running water, then place in a large saucepan. Add water and bring to a boil. Once boiled, add the onion and simmer over low heat for 50 minutes, until thick. Remove from heat and set aside to cool overnight in the fridge.

2. Combine all of the remaining ingredients, except for the flour and mix together to form a thick consistency. Knead the mixture and shape into golfball-sized balls. Place in the fridge to chill for around 1 hour. Coat each ball in flour and fry in a pan with a little olive oil, until golden.

These are great served alongside some horta and taramosalta. You can find my mother in law's recipe for taramosalta here.


Greek style chicken noodle soup with lemon (σοuπα με κοτoπουλο, μακαρoνια και λεμoνι)

$
0
0


Sometimes in life, there are those days or weeks when you need a soup that takes the better part of an afternoon to make. Be it the pangs of cooler days or the need to just get back to basics, this is the kind of soup that rewards you. Not only just from the flavours in the bowl, but also from the little bit of mindfulness that comes from an hour or two of simple, pressure free and uncomplicated pottering in the kitchen.


As much as I adore traditional avgolemono, the much-loved Greek chicken soup with egg and lemon that has nourished many generations, this soup (sans egg) is comforting in its simplicity and punchy lemon tang. While a more traditional avgolemono soup would use rice, in this soup I prefer the almost kitschy addition of some really old school noodles, in the form of a short pasta called 'koftaki' or 'kofto miso' in Greek. Keep this recipe in your back pocket for the winter months ahead, or for when you just need a little uncomplicated and undemanding time in the kitchen. 


Greek style chicken noodle soup with lemon (σούπα με κοτόπουλο, μακαρόνια και λεμόνι)


Ingredients 

2 medium brown onions, unpeeled and halved
2 garlic cloves, peeled and smashed 
2 large carrots, unpeeled and roughly chopped 
1 stick of celery, roughly chopped 
About 2 kg chicken bones (I prefer uncooked chicken legs/drumsticks) 
About 4 litres of water 
1 & 1/2 tablespoons of sea salt
3 fresh bay leaves 
1 small sprig of fresh rosemary
10-12 black peppercorns 
1 cup of koftaki' or 'kofto miso' short pasta 
4-6 tablespoons of fresh lemon juice, or to taste 

Method 

1. Place the chicken in a large stock pot and cover with water. Place over high heat and bring to a boil. Once boiling, reduce to a gentle simmer. Then skim any "scum" or impurities that rise in a foam to the top. Add the remaining ingredients, except the lemon and koftaki, cover with a lid. Then simmer for 2 & 1/2 - 3 hours.

2. Transfer the chicken to a large plate. Remove the meat from the bones and shred or chunk into bite sized pieces. Set aside the chicken meat aside and discard the bones. Take the stock pot off of the heat and strain the stock through a sieve (you can line with muslin if you want a really clear soup) and discard the remaining solids. 

3.  Clean the stock pot and then return the strained soup to the freshly cleaned pot. Bring the soup back to the boil. Add the koftaki. Reduce the heat a little and cook until pasta is al-dente. Add the chicken pieces and stir through, simmer for 2-3 minutes more. Serve immediately, seasoning with lemon juice and black pepper to taste. 


Preparing for Easter: baked mizithra and kefalograviera gnocchi with spicy tomato sauce

$
0
0


The delights of Easter are only one short week away and I can't wait to celebrate with a little cheese indulgence. In our house, the effort of abstaining from meat during great lent is not too hard a chore - given that Greek cuisine has honed so many wonderful vegetarian dishes over thousands of years. However, when it comes to cheese, its a different story. Abstaining from cheese in all its forms during lent is a true and honest act of sacrifice.

After what seems like one hundred weeks sans cheese, dairy and eggs, I'll be savouring these soft pillowy morsels - made with homemade mizithra and kefalograviera. They are simple to prepare and then baked in rich, spicy tomato based sauce - irresistible!!


When making the tomato sauce, I like to use the "Sparoza herb and spice blend for tomato sauce". It  has the most amazing aroma - it takes me straight to the spice shops of Athens (which I am looking forward to visiting later this year!!).  The other bonus in using the Sparoza spice blend is that it all comes in one handy packet, which means I don't have to completely ransack my spice draw. You can purchase this beautiful spice blend online from Homer St, my favourite online food store, which stocks a beautiful range of Greek Food and Hampers.


Baked mizithra and kefalograviera gnocchi with spicy tomato sauce 

For the gnocchi 

500g homemade mizithra or you can substitute ricotta 
1/2 cup of finely grated kefalograviera (you will also need a little extra for baking)
2 eggs, lightly beaten 
1 cup plain, all purpose flour
sea salt and cracked black pepper

For the sauce 

1/2 kg fresh ripe tomatoes, peeled halved and grated 
1 tablespoon of olive oil
2 bay leaves 
1 bunch of parsley, very finely chopped 
4 garlic cloves, sliced
1 teaspoon of Sparoza herb and spice blend for tomato sauces 
Pinch of sugar, to taste 
Pinch of salt, to taste 
Freshly ground black pepper to taste 


Method 

To make the tomato sauce

1. Add the oil to a medium sauce pan or pot and cook the garlic for 1-2 minutes. The add the spice mix and stir gently through the oil. Finally, add the remaining ingredients and and simmer until the sauce thickens, about 30 minutes. 

While the sauce simmers, make the gnocchi. 

For the gnocchi 

2. Place the mizithra, kefalograviera, eggs, flour, salt and pepper in a bowl and mix gently to combine. 

3. Turn the mixture out onto a lightly floured board or surface and roll into ropes. Cut the ropes into short lengths of about 2 cm and press onto the back of a fork (or a special Italian board, if you have one). 

4. Cook the gnocchi, in batches, in a large pot of boiling salted water. Cook them for about 2-3 minutes and they should rise to the surface when ready. Remove with a slotted spoon and place in oven safe gratin dishes (or one large baking dish if you prefer). 

To finish 

5. Spoon the tomato sauce over the gnocchi and top with a little more finely grated kefalograviera. Cook under a preheated hot grill until the cheese melts and is golden. Serves 4.  


Palm Sunday: Bakaliaro Bourdeto (Μπακαλιαρος μπουρδετο)

$
0
0


Bakaliaro (Μπακαλιάρος) or salt cod, is hugely popular in Greek cuisine. None more so than on two days during Lent, the Annunciation on March 25th and then again on Palm Sunday. It also just happens to be one of Mr K's most favourite dishes, when it served batter-fried in crisp pieces with pungent, garlicky skordalia. You can find a recipe for this style of bakaliaro here.

While fried bakaliaro is really delicious, this traditional "cucina povera" fish can also been enjoyed in a variety of other ways. For our Palm Sunday celebrations this year, I decided to forgo the fried affair and instead opted to try a traditional Ionian preparation for the salt cod, called a bourdeto.

A bourdeto (Μπουρδέτο) is an Ionian style of cooking, most commonly associated with the Island of Corfu. It is said to hail from the Venetian word 'brodeto' meaning broth. In its most basic form, a bourdeto involves fish, slowly simmered in a fresh in tomato sauce with onion, garlic and spicy red pepper or chilli - cooked down until all the liquid is removed from the pot and you are left with a thick, aromatic sauce.


To make our Palm Sunday bakaliaro bourdeto, I was very generously given some Bukovo Chilli Flakes from the wonderful Gina at Homer St - my favourite online Greek food providore. The bukovo chilli flakes are AMAZING!

This beautiful spice hails from Northern Greece and is made from red horn peppers that have been traditionally smoked with birch wood. They are mildly spicy and sweet, and bring the most incredible smoky depth of flavour - perfect for the bourdeto. The chilli should come with a warning label though, they are are so good, I have a feeling that I might become slightly addicted to them!!


Bakaliaro Bourdeto (Μπακαλιαρος μπουρδέτο)


Serves 4

If you haven't had time to prepare the salt cod by soaking it for 24 hours, you can substitute it with fresh cod fillets.

Ingredients

1/2 kg of salt cod
1/2 cup extra virgin olive oil
1 tablespoon of Bukovo Chilli Flakes
1/2 tablespoon of freshly ground black pepper
1 small bunch of fresh flat leaf parsely, finely chopped (plus some for garnish)
1 medium brown onion, sliced
1 head of fresh garlic, finely sliced
4 medium tomatoes, grated
1/2 kg potatoes, peeled and quartered
1/4 - 1/2 cup of water

Method

1. You need to start this dish a minimum of 24 hours before. Remove any excess salt from the cod and place in a large bowl, cover with cold water, place in the fridge and soak for a minimum of 24 hours. It is best to change the soaking water at least 4 times during the 24 hours. When the cod is ready, remove the skin and large bones and cut into serving pieces. You can skip this process by using fresh cod fillets instead of the traditional salt cod.

2. For the bourdeto, use a large casserole style pot (that has a lid) and that can be used on the stove top. Place the pot on a medium heat and then add the oil. When the oil becomes hot, add the Bukovo Chilli Flakes and stir through the oil to release their sweet, smokey flavour. After a minute or two, add the sliced onion and cook until soft, then add the garlic and cook until soft. Make sure to keep stirring the garlic and onions, so that they don't catch the bottom of the pot - the only smokey flavour you want is from the divine chilli flakes.

3. Next, add the grated tomato flesh, the black pepper and parsley. Then add the pieces of potato. Pour in about 1/4 of the cup of water - or until the potatoes are just about covered. Simmer the potatoes, covered, for about 20 - 30 minutes. When the potatoes are starting to become tender, but not soft, add the pieces of cod on-top. Simmer very gently, with the pot slightly covered but with the lid ajar, for another 30 minutes until the fish is very tender and the sauce has thickened. Serve immediately, sprinkled with some finely chopped parsley and a little dusting of the Bukovo Chilli Flakes. You'll also need some good homestyle bread on hand to soak up the beautiful smokey, garlicky tomato sauce.


Easy roast chicken with balsamic bay leaves and lemon (Kοτoπουλο ψητo με δαφνης μπαλσαμικο και λεμoνι)

$
0
0


The humble chicken is really a culinary blank canvas, just waiting for the right combination of herbs and spices, to bring it up to its true gastronomic potential. This is where the lovely Gina of Homer St, has once again stepped in with inspiration, generously providing me with some of her incredibly aromatic herbs and spices, direct from carefully sourced, high quality Greek producers. 

Most recipes for Greek style roast chicken always involve lemon in one form or another. Taking a tip from this tradition, in this recipe I have used a zesty lemon herb and spice blend from the producer Sparoza. The spice contains coriander, ginger, pink pepper, peppercorns, thyme, rosemary, bay leaves, mustard seeds, lemon zest, sage - and my favourite, lemon verbena. Opening the packet is just like walking into one of the spice merchants on Evripidou Street in Athens. To enhance the aromatic qualities of the chicken, I also added some balsamic bay leaves from the producers 'Daphnis and Chloe', which have an almost sweet nutmeg aroma. 


While the beautiful herbs and spices from Homer St have easily sorted the issue of flavour, the next challenge for a perfect roast chicken is trying to crack the secret of juicy meat and crisp skin! This is where my easy method for quick roast chicken comes to the fore. No mucking about with stuffing and trussing, I asked my local butcher to portion my whole roast chicken into large serving pieces. Next comes a shallow pan fry for crispy skin, before the pieces are gently rubbed with the aromatic herb and spice blend. The chicken pieces are then gently placed into an roasting tray which contains a shallow bath of latholemono - a mixture of extra virgin olive oil and fresh lemon juice - followed by a short stint in the oven. This method results in juicy, aromatic meat - and crispy flavoured filled skin. 


Roast chicken with balsamic bay leaves and lemon (Kοτόπουλο ψητό με δάφνης μπαλσάμικο και λεμόνι)


Serves 4 
Prep 20 mins, cooking 35 mins, resting 15 mins

Ingredients 

One size 16 chicken, cut into large pieces
30g butter
2 tablespoons of extra virgin olive oil (for frying)
1/4 cup of extra virgin olive oil (for the latholemono) 
6 Daphnis and Chloe Balsamic Bay Leaves
2-4 cloves of garlic, sliced
4 lemons
2 teaspoons of Sparoza herb and spice blend with lemon zest
1/2 kg small chat potatoes, peeled  

Method 

1. Preheat the oven to 180C / 160C fan forced. 

2. Parboil the potatoes for around 15-20 minutes, so that they are tender on the inside but not falling apart.  

3. To prepare the chicken pieces, make small slits in the flesh side with a sharp knife and insert a small piece of balsamic bay leaf and garlic into it. Also prepare the roasting tray by having it out ready to go. In a small jar (which has a lid), add the 1/2 cup of olive oil with the juice of 2 lemons. Seal the jar with a lid and shake vigorously until the mixture emulsifies to make the latholemono. Add this to the roasting pan - so you have a shallow bath ready and waiting for the chicken pieces. At this point, you can also add the parboiled potatoes - making sure they get a good coating of the latholemono. 

4. Next, heat the oil and butter in a large frying pan over medium-high heat. Cook the chicken pieces, skin side down, for a few minutes until golden. Take care not to dislodge the garlic and bay. 

5. Transfer the chicken pieces to the roasting pan, placing them skin side up in the latholemono, around the potatoes. Sprinkle the skin of the chicken with the Sparoza herb and spice blend and any remaining crumbled bay leaves and garlic slices. Drizzle with a little extra oil. Halve the two remaining lemons and also add these to the roasting tray. You could also add some whole garlic cloves at this point - if so inclined. Roast the chicken for 20-25 minutes or until it is cooked and tender. Allow the chicken to rest for around 15 minutes before serving. Divide the chicken pieces, roasted lemon and potato among plates, and spoon over the lemony pan juices (but avoid putting the juice directly onto the skin of the chicken - so it doesn't loose any of its crispness). 


Figs roasted with bay, spices and petimezi (Σuκα ψητo με δαφνης, μπαχαρικα και πετιμεζι)

$
0
0


One of nature's greatest gifts has to be figs. A nutrition packed sweet treat, that plays such an important part in Greek and Mediterranean diets. For the few short weeks at the end of summer and the beginning of autumn, I love to enjoy figs fresh from the tree - or when they run out, from our local farmer's market. The closer we get to winter though, the less perfect figs become. However, that said, oven-roasting figs will bring out the flavour of less-than-perfect, end of season figs.


In Greek cooking traditions, figs are often pared with spices - particularly when they are dried. In Corfu, black pepper is the spice of choice. In the other Ionian islands and the Peloponnese, bay leaves are often used to scent and help preserve the dried figs. On the island of Ikaria, dried figs are sprinkled with antioxidant-rich oregano when stored. In Chios, the spice of choice is of course mastiha and in other Aegean islands the choice of spice is often cinnamon.


In Crete, another regional cooking tradition involves serving dried figs dipped in grape must syrup, called petimezi. Grape must has been used as sweetener in Greece since ancient times. Along with honey, it was the only sweetener that was actually available and it came if varying degrees of concentration. In modern Greek cooking petimezi has a variety of uses - from moustalevria (a grape must pudding) to loukoumi, cakes, pastries and more.

This recipe is a little tribute to the different regional styles of preparing figs in Greece. it incorporates the traditional Cretan touch of some petimezi, as well as some spice elements - balsamic bay leaves, a little cinnamon, nutmeg and black pepper. I love using the 'Daphnis and Chloe' Balsamic Bay Leaves, which you can purchase online in Australia from Homer St, in this dish. They have a wonderful sweet spicy quality, with a hint of nutmeg. I like to enhance this element in this dish by also adding an extra pinch of nutmeg.

The spicy-sweet figs are perfect served with the contrasting texture of a little fresh mizithra made from sheep or goat's milk. You could substitute a little ricotta or fresh goat's cheese if you prefer. This dish makes for a super easy and refreshing dessert. If you happen to be having a bit of an Autumn harvest themed dinner, you can also add some clusters of red grapes to your roasting tray.


Figs roasted with bay, spices and petimezi (Σύκα ψητό με δάφνης, μπαχαρικά και πετιμέζι)

Serves 4

Prep 5 mins, cooking 15 mins

Ingredients

8-12 fresh figs, halved
1 tablespoon unsalted butter
3 tablespoons petmezi
6 Daphnis and Chloe Balsamic Bay Leaves (you can purchase these from Homer St)
Pinch ground cinnamon
Pinch of ground nutmeg
Pinch sea salt
Pinch of freshly ground black pepper
Fresh mizithra to serve, or you could substitute with fresh ricotta

Method

1. Preheat the oven to 180C fan forced or 200C.

2. Put the figs, cut side up, in a lined roasting tray.

3. In a small saucepan, melt the butter over low heat, and whisk in the petimezi and spices (except the bay leaves).

4. Drizzle the hot petmezi butter over the figs, tuck the bay leaves around the figs and roast in oven until very soft, about 15 minutes. Serve with the fresh mizithra or ricotta.


Feta, rigani and garlic dip with homemade pita bread

$
0
0


If you need a quick meze when entertaining, that requires minimal effort but has maximum effect, then this is a recipe for you. 


This simple, delicious feta, rigani and garlic dip hails from Kefalonia. The last time we stayed on the island, we bought it in simple little terracotta tubs from the local 'Galaktopoleio'. I love the fact that Greece still has speciality stores instead of only homogeneous supermarkets. The Galaktopoleio, is dedicated to selling milk and dairy products - plus the odd carton of eggs and it is where you can find treats like this! I make a milder form of this dip, in Kefalonia the version at the galaktopleio had been left to mature for a little while and the cheese was very sharp and pungent. 

Like with all Greek food, the success to this easy dip is using very high quality ingredients. Make sure you buy good quality Greek feta cheese, made with sheep or goat's milk and aromatic rigani from Greece. In this dip, I used some more of the wonderful range of herbs from Daphnis and Chloe - rigani which hails from the Peloponnese in Greece. You can purchase these herbs online from Homer St, Greek footsore.


The feta, garlic and rigani go very well together, and this quick meze is perfect served with some homemade pita bread, a quick tomato and red onion salad - plus a simple rustic style of wine, such as Robola from Kefalonia. 


Feta, riagni and garlic dip


Serves 4, as part of a meze 

Cooking time 15 mins 

Ingredients 

250g of feta
2 cloves of fresh garlic, mashed
2-3 tablespoons of extra virgin Greek olive oil
1/2 teaspoon of rigani 

Method 

1. Place the feta, rigani, garlic and olive oil in a blender or food processor and whir on a slow speed until smooth and well combined.  

2.  Spoon onto a plate and flatten slightly with the back of a spoon. Then drizzle with a little extra virgin olive oil and sprinkle with a pinch of rigani. 

3.  Serve with homemade pita, salad and wine as a part of meze selection. 


Greek cookbook writer, TV presenter and chef Vefa Alexiadou has collected hundreds of recipes from all over Greece for her brilliant and encyclopedic book, Vefa's Kitchen. This is her recipe for homemade pita bread and it is the best one I have used and I am sharing it here.  Making pita bread is super easy and only requires a heavy cast-iron pan and spatula to flip the pita bread.

Vefa's pita bread 


Ingredients 

3 & 1/2 cups all-purpose flour
1tsp. salt
1 & 1/2 tsp. active dry yeast
1 tsp. sugar
2 tbsp. olive oil
1 & 1/2 cups warm (body temperature) water
Coarse corn flour/cornmeal for dusting

Method 

1.In a large bowl, add the water, olive oil, yeast, salt and sugar and let stand for five minutes or until you see that the yeast is active.

2.Using your hands, gradually add the the flour into wet and knead with your hands until the dough pulls away from the sides of the bowl. Cover and leave in a warm spot in your kitchen to rise and rest for about 30 minutes.

3.Divide into six pieces and roll out into 8 to 10 -inch rounds that are about 1/4 inch thick. Dust both sides lightly with cornmeal and lightly poke the surface of your pita breads with the tines of a fork (careful not to poke right through).

4.Place a heavy cast-iron skillet (non-stick pan is fine as well) and heat to medium-high. You may place your pita dough on corn-meal lined pizza peel to slide onto the hot skillet.

5.Pour some oil in a small bowl and dunk some kitchen towel in it and grease your hot cast iron skillet.

6.Place your pita dough on the hot skillet and and fry the bread for a couple of minutes a side or until they start to puff and bubble up. Flip and fry the other side.

7.Place fried pita breads on to a large cotton kitchen towel and cover. Dab your kitchen towel into the bowl of vegetable oil and place another flattened pita dough on the skillet.

8.Repeat frying each pita bread and stack them, tucked inside the kitchen towel. Serve warm or allow to cool inside the kitchen towel until cooled. Store in a sealed plastic bag for up to a week or freeze.


Viewing all 231 articles
Browse latest View live